

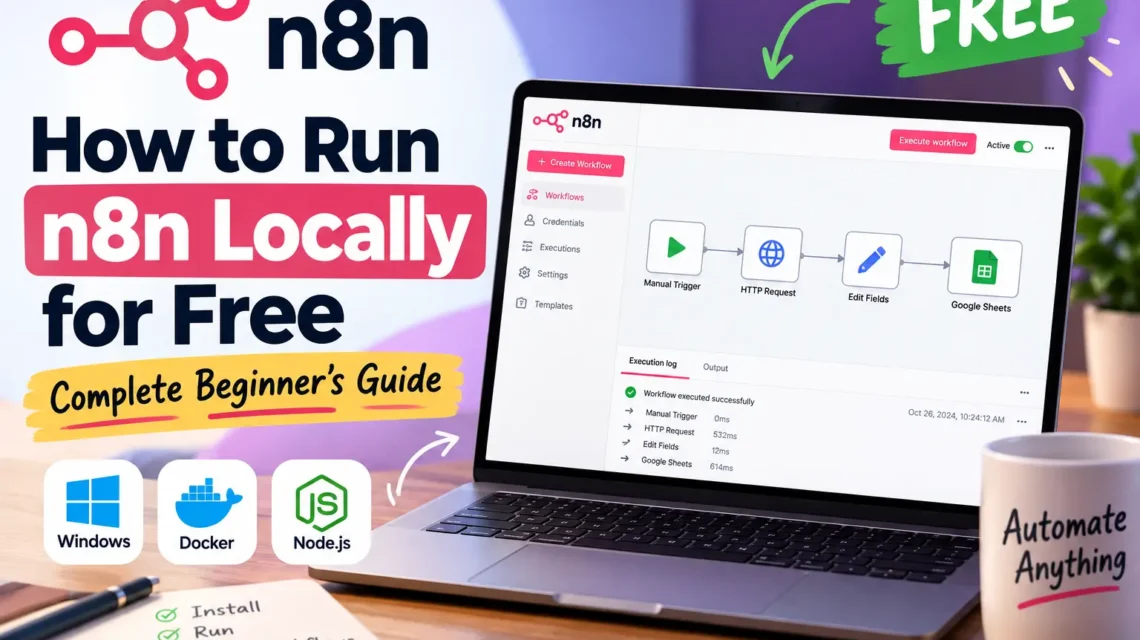
If you want to automate repetitive tasks without paying for a cloud automation platform, you can run n8n locally for free on your own computer.
n8n is a workflow automation platform that lets you connect applications, APIs, databases, AI services, and other tools with little or no code. n8n officially supports self-hosting, including installation through npm and Docker.
The best part is that you don’t need to rent a server just to learn n8n. For personal projects, testing, development, and many internal automation use cases, you can install the self-hosted Community Edition on your own computer.
In this guide, you’ll learn how to run n8n locally for free with this beginner’s guide. Additionally covers its related important details
What Is n8n?
n8n is a workflow automation tool that allows you to connect different applications and automate processes.
For example, you could create a workflow that:
New form submission → Google Sheets → AI processing → Gmail notification
Or:
New website article → AI content analysis → Slack notification → Database
Instead of manually performing each step, n8n executes the workflow automatically.
Unlike many traditional automation platforms, n8n can be self-hosted. That means the software can run on infrastructure that you control, including your own computer. n8n’s documentation specifically lists npm and Docker as ways to run n8n locally.
Is n8n Free to Run Locally?
Yes, n8n provides a free self-hosted Community Edition.
n8n’s current pricing information lists Community Edition as a standard self-hosted version available through GitHub. n8n also states that users who are open to self-hosting can use the free Community Edition instead of n8n Cloud.
However, “free” doesn’t mean that every possible n8n feature is free. Some advanced capabilities are associated with paid self-hosted plans, and n8n’s licensing terms matter if you’re using n8n in a commercial product or providing an n8n-based service to customers.
For a normal personal setup, learning environment, or permitted internal use case, running the Community Edition locally can be a very inexpensive way to get started.
Important: Always check n8n’s current licensing terms if you plan to offer n8n itself as a service, host workflows for clients, or embed it into a product. n8n specifically distinguishes these use cases from ordinary internal use.
What Do You Need to Run n8n Locally?
Before starting the n8n local installation, you need:
- A Windows, macOS, or Linux computer
- Internet connection for downloading n8n and connecting external services
- Node.js if you use npm
- Docker Desktop if you use Docker
- Basic knowledge of the command line
- Enough disk space for your workflows and execution data
There are two beginner-friendly approaches:
Method 1: npm
Install n8n directly through Node.js and npm.
Best for: Beginners who want a straightforward local development setup.
Method 2: Docker
Run n8n inside a Docker container.
Best for: Users who want an isolated, reproducible environment and are comfortable with Docker.
For a first-time Windows user, I recommend starting with npm unless you already use Docker.
How to Run n8n Locally for Free Using npm
Installing n8n with npm is one of the simplest ways to create an n8n local server.
Step 1: Install Node.js
First, install a current Node.js version that is compatible with the n8n version you intend to use.
After installation, open Command Prompt or PowerShell and check whether Node.js is installed:
node -v
Then check npm:
npm -v
If both commands return version numbers, Node.js and npm are ready.
Step 2: Install n8n
Open Command Prompt or PowerShell and run:
npm install n8n -g
The -g option installs n8n globally so that you can invoke the n8n command from your terminal.
After the installation finishes, verify it:
n8n –version
If a version number appears, the installation was successful.
Step 3: Start n8n
Run:
n8n
Depending on the installed version and environment, n8n will start its local service and provide a local URL.
In the standard local setup, you can normally access the editor at:
http://localhost:5678
Open that address in your browser.
You should see the n8n setup or login interface.
How to Run n8n Locally for Free on Localhost
Once n8n is running, open:
http://localhost:5678
The word localhost means your own computer.
The number 5678 is the commonly used n8n web port in a standard local installation.
So when you visit:
http://localhost:5678
your browser is communicating with the n8n server running on your computer.
This is why you don’t need a public website, VPS, or cloud server just to learn n8n locally.
How to Use n8n Locally
After opening your local n8n dashboard, you can create workflows just like you would with a hosted n8n instance.
A simple workflow could look like:
Manual Trigger
↓
HTTP Request
↓
Edit Fields
↓
Google Sheets
You can connect services through n8n nodes and configure credentials for services that require authentication.
For example, you can build automations involving:
- Gmail
- Google Sheets
- Slack
- Telegram
- Notion
- databases
- REST APIs
- AI services
- webhooks
- CRMs
- project-management tools
n8n is designed to connect applications and APIs and manipulate their data through workflows.
Create Your First n8n Workflow
Let’s create a very simple workflow to confirm that your local n8n installation works.
Step 1: Create a Workflow
Open your n8n dashboard and create a new workflow.
Step 2: Add a Manual Trigger
Search for:
Manual Trigger
Add it to the canvas.
Step 3: Add an Edit Fields Node
Add an Edit Fields node after the trigger.
Create a simple field such as:
message = Hello from my local n8n installation!
Step 4: Connect the Nodes
Connect:
Manual Trigger → Edit Fields
Step 5: Execute the Workflow
Click Execute Workflow.
If the workflow executes successfully, your local n8n installation is working.
Congratulations—you now have a functioning n8n local development environment.
How to Run n8n Locally for Free on Windows
If you’re using Windows, the npm approach is usually easy to understand.
The basic process is:
Install Node.js
↓
Open Command Prompt
↓
Install n8n
↓
Start n8n
↓
Open localhost:5678
Commands:
node -v
npm -v
npm install n8n -g
n8n
Then open:
http://localhost:5678
This gives you an n8n localhost setup on Windows without requiring a cloud subscription.
Can You Run n8n Without Docker?
Yes. Docker is not mandatory for running n8n locally.
You can install and run n8n through npm, which is especially convenient if you’re learning n8n or experimenting with local workflow automation.
n8n officially documents both npm and Docker as hosting/installation approaches.
If you don’t want to install Docker Desktop, the npm method is a good alternative.
How to Run n8n Using Docker
Docker is another popular way to create a local n8n server.
The major advantage is isolation: n8n runs inside a container rather than being installed directly into your operating system environment.
Step 1: Install Docker Desktop
Install Docker Desktop for your operating system and make sure Docker is running.
Then verify Docker from the terminal:
docker –version
Step 2: Create a Persistent n8n Volume
Run:
docker volume create n8n_data
This creates persistent storage for your n8n data.
Persistent storage is important because you don’t want your workflows and configuration to disappear whenever you recreate a container.
Step 3: Run n8n
A basic Docker command is:
docker run -it –rm \
–name n8n \
-p 5678:5678 \
-v n8n_data:/home/node/.n8n \
docker.n8n.io/n8nio/n8n
On Windows PowerShell, you may prefer the command on one line:
docker run -it –rm –name n8n -p 5678:5678 -v n8n_data:/home/node/.n8n docker.n8n.io/n8n
Once the container starts, open:
http://localhost:5678
You should be able to access your local n8n instance.
n8n npm vs Docker: Which Should You Choose?
| Feature | npm | Docker |
| Beginner friendly | Excellent | Good |
| Docker knowledge required | No | Yes |
| Easy local testing | Excellent | Excellent |
| Isolated environment | Less | Yes |
| Good for development | Yes | Yes |
| Easy to reproduce | Moderate | Excellent |
| Persistent storage | Local filesystem | Docker volume |
| Best for beginners | Yes | If familiar with Docker |
My recommendation
If your objective is simply:
“I want to run n8n locally for free and learn how it works.”
Start with npm.
If you already understand containers or want a cleaner, reproducible setup, choose Docker.
Where Does n8n Store Data Locally?
When you self-host n8n, your workflows, credentials, configuration, and execution-related data need to be stored somewhere.
The exact storage behavior depends on your installation and configuration.
This is one reason you should think about backups before using a local n8n instance for important automation.
For Docker installations, using a persistent volume such as:
n8n_data:/home/node/.n8n
helps keep your n8n data outside the temporary container lifecycle.
Do not assume that reinstalling n8n automatically means your data is safely backed up.
A backup strategy is particularly important if your workflows become business-critical.
How to Keep Your Local n8n Data Safe
Running n8n locally gives you more control, but it also means you are responsible for the local environment.
Consider regularly backing up:
- n8n configuration
- workflows
- credentials/configuration
- important execution data
- Docker volumes
- databases, if you use an external database
Never publish sensitive credential files to a public GitHub repository.
If you use Git for workflow-related development, keep private repositories private and understand what workflow and credential information is being stored. n8n’s own source-control documentation warns about exposing workflow and credential stubs in public repositories.
Is Local n8n More Private Than n8n Cloud?
It can provide greater control over where your n8n instance and its data are hosted, but self-hosting does not automatically make an installation secure.
You become responsible for:
- Operating-system security
- Network security
- Authentication
- Updates
- Backups
- Firewall configuration
- Secrets and credentials
- Exposed webhooks
- Community nodes
- Third-party APIs
n8n specifically provides a security-audit capability that can identify issues involving credentials, databases, filesystem access, nodes, webhooks, security settings, and outdated instances.
For a local computer used only on your private network, your exposure may be relatively limited. But exposing n8n directly to the public internet is a different security problem and should not be treated as a simple localhost setup.
How to Secure a Local n8n Installation
Follow these basic practices:
1. Keep n8n updated
Don’t leave a production automation system running an outdated version indefinitely.
2. Protect your computer
Use a supported operating system and keep security updates enabled.
3. Protect credentials
Never share API keys, passwords, OAuth secrets, or other credentials in screenshots, blog posts, public repositories, or workflow exports.
4. Be careful with community nodes
Third-party or community nodes can introduce additional security considerations.
5. Don’t expose localhost unnecessarily
If you only need n8n for local development, there is usually no reason to expose your instance directly to the public internet.
6. Back up important workflows
A local computer can fail, be reset, infected, or lose data.
7. Run a security audit
n8n provides the n8n audit command for security auditing.
Why Can’t My Webhook Work on Localhost?
This is one of the most common problems beginners encounter.
Suppose your workflow contains a webhook URL such as:
http://localhost:5678/webhook/…
That URL points to your own computer.
An external service on the internet cannot normally reach your computer through its localhost address.
For example:
External Service
↓
Internet
↓
Your Public URL
↓
Your n8n Instance
is different from:
External Service
↓
localhost
The second arrangement generally doesn’t work because localhost refers to the machine making the request.
For local development, you may need an appropriate tunneling or public endpoint solution when an external service must send requests into your local machine.
For production use, use a properly secured public deployment rather than casually exposing your personal computer.
n8n Localhost Not Working: Common Fixes
If http://localhost:5678 doesn’t open, work through these checks.
Problem 1: n8n isn’t running
Run:
n8n
If you’re using Docker, check:
docker ps
Problem 2: Port 5678 is already being used
Another application may already be using the port.
Check the terminal output for an error and identify the process using the port.
You can then stop the conflicting application or configure n8n to use another available port.
Problem 3: npm installation failed
Check:
node -v
npm -v
Then review the error displayed during:
npm install n8n -g
A Node.js compatibility issue, permissions problem, or corrupted npm environment can cause installation failures.
Problem 4: Docker container stops
Check:
docker ps -a
Then inspect the container logs:
docker logs n8n
The logs usually provide a much better clue than simply seeing that the browser cannot connect.
n8n Cloud vs Local n8n
The biggest difference is who manages the infrastructure.
| Local n8n | n8n Cloud | |
| Hosting | You | n8n |
| Infrastructure | Your responsibility | Managed |
| Local testing | Excellent | Not the primary purpose |
| Maintenance | You | n8n |
| Backups | You plan them | Managed according to service |
| Internet exposure | Optional | Cloud service |
| Cost | Software can be free | Paid plans after applicable trial/offer |
| Technical knowledge | Higher | Lower |
| Control | High | Less infrastructure control |
n8n currently lists hosted Cloud plans as well as a Community Edition for self-hosting.
Choose local n8n if:
- You are learning n8n.
- You want to experiment for free.
- You want local development.
- You prefer controlling your environment.
- You don’t want to pay for cloud hosting just to test workflows.
Choose n8n Cloud if:
- You don’t want to maintain infrastructure.
- You need a managed environment.
- You want to avoid local machine dependency.
- You need your automations available without keeping your PC running.
Can You Run n8n 24/7 on Your Computer?
Technically, yes. But your computer needs to remain:
- powered on
- connected to the network
- running n8n
- sufficiently stable
- protected against unauthorized access
If your computer shuts down, sleeps, loses internet connectivity, or n8n stops, your local automations may stop working.
This is why a local computer is excellent for learning and development, while a dedicated server or managed hosting setup may make more sense for critical production workflows.
Does Local n8n Cost Anything?
The n8n software itself can be used through the free Community Edition when self-hosted, but running an automation can still involve other costs.
For example, your workflow might use:
- OpenAI API
- Google APIs
- paid email services
- paid databases
- third-party SaaS platforms
- proxy services
- external hosting
Those services may charge independently of n8n.
So the accurate answer is:
You can run n8n locally without paying n8n for the Community Edition, but connected third-party services may have their own costs.
n8n’s current pricing page identifies Community Edition as a self-hosted option, while paid plans provide additional capabilities.
Is n8n Open Source?
You will often see n8n described as an open-source or fair-code workflow automation platform.
However, don’t assume that “open source” means there are no licensing restrictions for every possible commercial use.
n8n’s current documentation describes n8n as a fair-code licensed workflow automation tool, and its licensing terms distinguish between permitted self-hosting and commercial use cases such as hosting workflows for clients or embedding n8n into a product.
If you’re simply learning or using n8n for your own permitted workflows, the Community Edition is the obvious place to start.
If you intend to build a business around providing n8n instances or workflows to customers, check the current n8n licensing terms before launching.
Free n8n Community Edition Features
The free Community Edition provides a strong starting point for people who want to learn workflow automation.
You can use it to build workflows, connect integrations, experiment with APIs, and create local automation systems.
n8n also provides a free Community Edition registration that can unlock features such as folders, editor debugging, and custom execution data.
For most beginners, there’s no reason to pay for advanced features before you’ve learned how n8n works.
Who Should Run n8n Locally?
Local n8n is particularly useful for:
Beginners
You can learn workflow automation without immediately paying for hosting.
Developers
You can build and test workflows locally before deploying them elsewhere.
AI automation enthusiasts
n8n can connect AI services with other applications and APIs.
Content creators
You can automate parts of content research, processing, publishing, and reporting.
Small businesses
Internal workflow automation can be tested locally before moving to a production environment.
API developers
n8n provides a visual environment for testing API-based workflows.
Common n8n Local Setup Mistakes
Avoid these mistakes when starting.
Mistake 1: Installing without checking prerequisites
Always verify your Node.js and npm installation before troubleshooting n8n.
Mistake 2: Closing the terminal
If your n8n process is running directly from a terminal, closing that process can stop the local server.
Mistake 3: Forgetting backups
Your local machine is not automatically a backup system.
Mistake 4: Exposing n8n publicly without security
Don’t treat a development installation like a production server.
Mistake 5: Storing API keys publicly
Never publish credentials inside tutorials, screenshots, repositories, or workflow exports.
Mistake 6: Installing unknown community nodes
Third-party components can introduce additional risk.
Frequently Asked Questions
Can I run n8n locally for free?
Yes. n8n offers a free self-hosted Community Edition. You can install it locally using supported approaches such as npm or Docker.
How do I install n8n locally?
One straightforward method is to install Node.js, then run:
npm install n8n -g
After installation, start n8n with:
n8n
Then open the local n8n address in your browser.
How do I run n8n on localhost?
Start your n8n instance and open:
http://localhost:5678
The exact URL or port can differ if you’ve changed the configuration.
Can I run n8n without Docker?
Yes. Docker isn’t required. You can use npm to install and run n8n locally. n8n officially documents npm and Docker as installation approaches.
Can I install n8n on Windows?
Yes. Windows users can run n8n locally, including through npm or Docker.
Is n8n free for local use?
The Community Edition is available as a free self-hosted option. However, check n8n’s current license if your use case involves providing n8n-based services to customers or embedding n8n into a commercial product.
Can I Run N8n On My Own Computer?
Yes. That’s one of the main advantages of self-hosting. Your computer can act as the local n8n server.
Does N8n Work Offline?
The n8n interface can run locally, but the usefulness of your workflows depends on what they connect to. Workflows that call external APIs or cloud services generally require internet access.
How much RAM does n8n need?
There isn’t one universal RAM requirement that fits every workflow. Resource usage depends on the number and complexity of workflows, execution volume, data size, nodes, and external services.
For learning and small experiments, start with your existing computer and monitor resource usage rather than assuming you need a powerful server.
Why isn’t my n8n webhook working?
A local webhook cannot normally be reached directly by an external internet service because localhost refers to your own machine. You need an appropriate publicly reachable endpoint or tunnel for external services to send requests into your local environment.
Is local n8n better than n8n Cloud?
Neither is universally better.
Local n8n gives you more control and can be free for the software itself.
n8n Cloud reduces infrastructure and maintenance work.
Your choice depends on whether you value control or convenience.
Final Verdict: Is Running n8n Locally for Free Worth It?
Yes—especially if you’re learning automation.
Running n8n locally gives you a practical environment where you can experiment with workflows, APIs, AI tools, webhooks, databases, and integrations without immediately paying for hosted automation.
For beginners, the easiest starting point is:
Install Node.js
↓
npm install n8n -g
↓
n8n
↓
http://localhost:5678
↓
Create your first workflow
If you already use Docker, the Docker method is an excellent alternative because it provides a more isolated and reproducible environment.
The most important thing to remember is that free self-hosting doesn’t eliminate responsibility. Once you use n8n for important automation, you need to think about backups, security, updates, credentials, networking, and licensing.
Start locally, learn how n8n works, build a few useful workflows, and only then decide whether you need a dedicated server or n8n Cloud.
Quick Reference
npm installation
npm install n8n -g
Start n8n
n8n
Local URL
http://localhost:5678
Docker volume
docker volume create n8n_data
Docker installation
docker run -it –rm –name n8n -p 5678:5678 -v n8n_data:/home/node/.n8n docker.n8n.io/n8nio/n8n
Security audit
n8n audit
Author’s Note
This guide focuses on practical local installation and beginner-friendly self-hosting. n8n’s hosting options, pricing, licensing, supported versions, and security recommendations can change over time. Before deploying n8n for production or commercial customer-facing use, verify the current information in n8n’s official documentation and licensing pages.