
AI photo editing has become easier than ever. You no longer need advanced Photoshop skills or expensive editing software to improve a photograph, change its background, remove unwanted objects, or create professional-looking images.
With artificial intelligence, you can upload a picture, describe the changes you want, and let an AI-powered editor do much of the work.
But how do you edit AI photos? Which tools should you use? Can you edit AI-generated images without Photoshop?
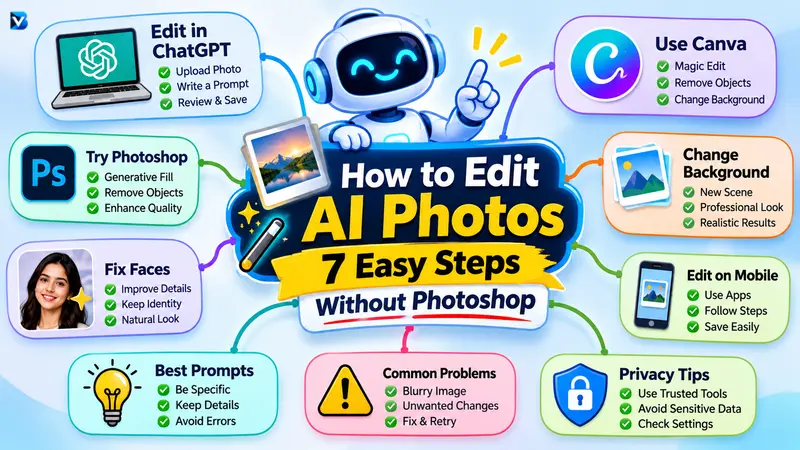
In this guide, you’ll learn how to edit AI photos step by step using tools such as ChatGPT, Canva, and Adobe Photoshop. You’ll also discover how to change backgrounds, fix AI-generated faces, remove unwanted objects, edit pictures on mobile, and write effective AI photo editing prompts.
Whether you’re a beginner, blogger, photographer, or content creator, this guide will help you get started.
What Is AI Photo Editing?
AI photo editing is the process of using artificial intelligence to modify, enhance, or transform digital photographs.
Traditional photo editing often requires manually adjusting brightness, contrast, colors, layers, and other settings. AI-powered editing tools can automate many of these tasks or allow you to describe your desired changes using simple text instructions.
For example, you can upload a portrait and ask an AI editor:
“Replace the background with a professional photography studio. Keep the person’s original face, hairstyle, clothing, and pose unchanged.”
The AI analyzes the image and generates an edited version based on your instructions.
Common AI photo editing tasks include:
- Background replacement: Replace an ordinary background with an office, studio, beach, or landscape.
- Object removal: Remove unwanted people, objects, cables, or distractions.
- Photo enhancement: Improve lighting, colors, contrast, and image clarity.
- Portrait editing: Retouch photographs while maintaining natural facial details.
- Image restoration: Repair scratches, faded colors, and other visible damage in old photographs.
- Creative editing: Change clothing, add objects, and apply different visual styles.
AI editing can work differently from traditional editing. Some tools adjust existing image details, while generative tools create new pixels to replace or extend parts of an image.
This means the result may not always preserve every original detail. Always review the edited image before downloading or publishing it.
Best AI Photo Editing Tools for Beginners
Choosing the right tool depends on what you want to accomplish.
Some AI editors are designed for quick background changes, while others provide advanced controls for professional editing.
Here are four useful options for different editing requirements.
| AI Photo Editing Tool | Best For | Main Features |
| ChatGPT Images | Prompt-based photo editing | Image editing through natural-language instructions |
| Canva | Beginners and content creators | AI editing, object removal, background replacement |
| Adobe Photoshop | Advanced editing | Generative Fill, detailed selections, layers |
| Meta AI | Meta AI image editing | Editing supported AI-generated images |
1. ChatGPT Images
ChatGPT Images is useful when you want to edit a photograph by describing the changes you need.
You can upload an existing picture or select an image generated in ChatGPT and request modifications using natural-language prompts.
Some available capabilities include:
- Changing image backgrounds.
- Adding or removing visual elements.
- Editing selected areas.
- Adjusting image composition.
- Creating images in different aspect ratios.
ChatGPT Images is available on web, iOS, and Android. Feature availability and usage limits can vary by account and product settings.
Official guide: https://help.openai.com/en/articles/11084440-images-in-chatgpt
Best for: Beginners who prefer describing their editing requirements instead of manually adjusting multiple settings.
2. Canva AI Photo Editor
Canva is a useful option for editing pictures and creating designs in one place.
Its AI-powered photo editor provides features for adding, replacing, or removing image elements.
Useful features include:
- Magic Edit for adding or replacing selected content.
- Magic Eraser for removing unwanted elements.
- Background Generator for creating or changing backgrounds.
- Background Remover for removing image backgrounds.
- Image Upscaler for improving low-resolution images.
Some advanced features depend on the Canva plan and available AI usage.
Official tool: https://www.canva.com/features/ai-photo-editing/
Best for: Bloggers, social media creators, marketers, and beginners who create visual content.
3. Adobe Photoshop
Adobe Photoshop is suitable when you need more control over individual image details.
Its AI-powered Generative Fill feature can add or remove content within a selected area. You can also use layers and traditional editing tools to refine the final result.
For example, you can select an unwanted object and generate replacement content that matches the surrounding image.
Official tutorial: https://www.adobe.com/learn/photoshop/web/remove-image-areas-generative-fill
Best for: Photographers, professional designers, and users who need detailed editing controls.
4. Meta AI
Meta AI provides image-generation and editing experiences in supported products.
In supported WhatsApp experiences, users can edit certain Meta AI-generated images by opening the image, selecting Reply, and describing the required change.
Availability can depend on your region, language, and supported application experience.
Official instructions: https://faq.whatsapp.com/1152458445801314/
Best for: People who already create images using Meta AI.
How to Edit AI Photos in ChatGPT
ChatGPT is one of the convenient options for beginners because you can explain your desired changes instead of manually using complicated editing tools.
You can edit an AI-generated image or upload an existing photograph.
Follow these steps.
Step 1: Open ChatGPT
Visit https://chatgpt.com/ using your browser or open the ChatGPT mobile application.
Sign in to your account and start a conversation.
You can also select Images from the ChatGPT navigation to access the image-generation experience.
Step 2: Upload Your Photo
Select the attachment option in the message box and upload the photograph you want to edit.
You can choose different types of pictures, including:
- Selfies and portraits.
- Product photographs.
- Travel pictures.
- Landscape images.
- AI-generated photographs.
- Social media images.
For better results, start with a clear, high-quality original photograph.
Step 3: Write an AI Photo Editing Prompt
After uploading the photograph, explain exactly what you want to change.
Avoid using vague instructions such as:
“Make my photo look better.”
Instead, describe the background, lighting, appearance, and other details.
For example:
“Improve the lighting in this photograph and replace the background with a clean professional photography studio. Preserve the person’s original face, hairstyle, clothing, expression, and body proportions. Maintain realistic skin texture and natural shadows.”
A detailed prompt makes your editing requirements easier to understand.
Step 4: Select the Area You Want to Edit
You don’t always need to change the entire photograph.
ChatGPT’s image editor provides a selection tool that lets you highlight a particular area and describe what should change.
For example, you can select the background and write:
“Replace the selected background with a modern office interior. Keep the person and their clothing unchanged.”
This is useful when you want to change one particular object or area.
However, selection boundaries are not always exact. AI-generated edits may extend beyond the highlighted region.
Step 5: Review and Refine the Result
After the AI generates your edited image, inspect it carefully.
Check the following:
- Is the original face still recognizable?
- Does the background look realistic?
- Are the shadows and lighting consistent?
- Are the hands and fingers natural?
- Have any important details changed?
When something looks incorrect, provide another instruction.
For example:
“Keep the current background, but make the lighting softer and restore the original facial proportions.”
You can repeat this process until the result meets your requirements.
Step 6: Save Your Edited Photo
When you’re satisfied with the result, open the image and select Save.
You can download it to your device or copy and share it using the available image controls.
ChatGPT also stores generated images in its Images area, where you can revisit them.
You can find more information in the official ChatGPT Images guide.
How to Edit AI Images Without Photoshop
You don’t need Photoshop for every photo-editing task.
Browser-based AI tools such as ChatGPT and Canva can handle many common editing requirements.
Here’s how to edit AI images using Canva.
Step 1: Open Canva
Visit https://www.canva.com/ and sign in to your account.
Open the Photo Editor from the homepage.
Step 2: Upload Your Photograph
Select the upload option and choose the photograph you want to edit.
You can also open an existing Canva design and select an image inside it.
Step 3: Choose an AI Editing Feature
Select your image and open the editing tools.
Choose the feature that matches your requirement.
| Editing Task | Canva Feature |
| Remove unwanted objects | Magic Eraser |
| Add or replace image elements | Magic Edit |
| Remove a complete background | Background Remover |
| Generate a new background | Background Generator |
| Improve image resolution | Image Upscaler |
| Adjust brightness and colors | Adjustments |
The availability of some features depends on your account and plan.
Step 4: Describe the Changes
For features such as Magic Edit, select or brush over the area you want to modify.
Then describe what you want to add or replace.
For example:
“Replace this selected area with a green indoor plant that matches the natural lighting of the room.”
Generate the edit and inspect the result.
Step 5: Download Your Image
Once the editing is complete, download the image in an available format such as PNG or JPG.
This method is useful for blog graphics, social media posts, product images, and promotional designs.
How to Change the Background in AI Photos
Background replacement is one of the most common AI photo editing tasks.
You can use it to transform an ordinary selfie into a professional portrait or replace a distracting background with a cleaner environment.
Follow these steps:
- Open an AI photo editor.
- Upload the photograph you want to modify.
- Select the existing background if a selection tool is available.
- Describe the new background you want.
- Ask the AI to preserve the original subject.
- Generate the edited image.
- Review the edges, lighting, and shadows.
- Save the final photograph.
Background Replacement Prompt
Use this prompt as a starting point:
“Replace the existing background with a modern professional photography studio. Keep the person’s original face, hairstyle, clothing, body proportions, and pose unchanged. Match the lighting, shadows, perspective, and depth of field naturally. Make the final image look realistic and professionally photographed.”
Tips for Realistic Background Changes
A good background replacement should look natural rather than pasted onto the original photograph.
Pay attention to:
- Lighting: The new background should match the direction and intensity of the subject’s light.
- Shadows: The subject should have realistic contact shadows where appropriate.
- Hair edges: Avoid unnatural outlines around the hair.
- Perspective: The background should match the camera angle.
- Color: The subject and background should have a consistent color balance.
These details can make a major difference in the final result.
How to Fix AI-Generated Faces
AI-generated images sometimes contain distorted facial features, unusual eyes, unnatural skin textures, or inconsistent facial proportions.
You can use an AI photo editor to request corrections.
However, AI editing cannot guarantee exact identity preservation.
Steps to Improve Facial Details
- Upload the original image.
- Select the facial area that needs improvement when selection is available.
- Explain the specific problem.
- Ask the AI to preserve the person’s facial structure and appearance.
- Review the eyes, nose, mouth, and skin texture.
- Refine the result if necessary.
AI Face Correction Prompt
“Improve the facial details in this image while preserving the person’s original identity, facial structure, natural skin texture, expression, and proportions. Correct visible distortions and make the eyes, nose, and mouth look natural. Avoid excessive skin smoothing or artificial facial changes.”
Important: Always compare the edited image with the original. This is especially important when editing personal portraits or photographs used for professional purposes.
How to Edit AI Photos on Mobile
You can edit AI photos using a smartphone without opening a desktop editing application.
ChatGPT and Canva offer mobile editing experiences, although the available controls may vary between application versions and devices.
Editing AI Photos with ChatGPT on Android and iPhone
- Open the ChatGPT mobile application.
- Upload the photograph you want to edit.
- Describe the changes in the message box.
- Review the generated result.
- Open the image to access its editing controls.
- Use Edit to describe additional changes.
- Use Select to highlight a specific area when available.
- Select Next and describe the modification.
- Review and save the edited image.
The mobile editor provides options such as selection, undo, redo, and image resizing where supported.
Editing AI Photos with Canva Mobile
- Open the Canva mobile application.
- Select the Photo Editor.
- Upload your photograph.
- Select the AI editing tool you need.
- Make the required changes.
- Review the final photograph.
- Download or share the image.
Tips for Better Mobile Editing
- Upload the original image instead of a compressed screenshot.
- Avoid applying too many filters.
- Zoom in to inspect facial and object details.
- Save a backup before making major changes.
- Review the final image before posting it online.
Best AI Photo Editing Prompts
A good editing prompt helps the AI understand what you want to change.
Instead of writing general instructions, explain the exact editing task and the details that must remain unchanged.
Here are some useful prompts you can copy and modify.
1. Professional Portrait Prompt
“Turn this photograph into a professional studio portrait with balanced lighting and a clean background. Preserve the person’s original facial features, expression, hairstyle, and natural skin texture.”
2. Background Replacement Prompt
“Replace the existing background with a modern office interior. Keep the subject unchanged and match the lighting, shadows, and perspective naturally.”
3. Object Removal Prompt
“Remove the selected unwanted object from this photograph and naturally reconstruct the surrounding area. Keep all other elements unchanged.”
4. Photo Enhancement Prompt
“Improve the brightness, contrast, color balance, and image clarity while preserving the original composition and natural appearance.”
5. Face Correction Prompt
“Correct visible facial distortions while preserving the person’s original identity, facial structure, expression, and realistic skin texture.”
6. Product Photography Prompt
“Improve this product photograph with clean studio lighting, realistic shadows, and a simple professional background. Preserve the exact product shape, color, branding, and labels.”
7. Social Media Photo Prompt
“Improve this photograph for social media with balanced colors, natural lighting, sharp details, and a polished appearance. Keep the original subject recognizable.”
8. Old Photo Restoration Prompt
“Restore this old photograph by reducing scratches, dust, fading, and visible damage. Preserve the original people, facial features, composition, and historical appearance.”
For more ready-to-use ideas, explore our guide to 100 Powerful AI Photo Editing Prompts.
A Simple Formula for Writing Better AI Editing Prompts
You can create your own AI photo editing prompts using this structure:
What to change + What to preserve + Desired appearance + What to avoid
For example:
“Change the background to a modern office + preserve the original face and clothing + use natural professional lighting + avoid facial changes and artificial shadows.”
This formula works as a useful starting point across many prompt-based image editors.
Common AI Photo Editing Problems and Solutions
Even with detailed instructions, AI editing tools can generate unexpected results.
Here are some common problems and practical ways to address them.
| Problem | Possible Solution |
| Face looks different | Ask the AI to preserve facial structure and compare the result with the original. |
| Hands look distorted | Select the affected area and request a specific correction. |
| Background looks artificial | Mention realistic lighting, shadows, and perspective. |
| Image looks blurry | Start with a higher-quality original image and use an appropriate enhancement tool. |
| Text or logos become incorrect | Avoid generative editing over important text and recreate text manually when accuracy matters. |
| Skin looks unnatural | Request natural skin texture and avoid excessive smoothing. |
| Unwanted areas change | Use a smaller selection and more precise instructions. |
| Product shape changes | Explicitly instruct the AI to preserve the product’s dimensions, labels, colors, and design. |
A useful approach is to make one major edit at a time. This gives you more control and makes unwanted changes easier to identify.
Privacy and Safety Tips When Editing AI Photos
Before uploading a photograph to an online AI editor, consider what information it contains.
A personal photograph may include identifiable people, private surroundings, or sensitive visual information.
Follow these precautions:
- Avoid uploading confidential photographs or sensitive documents.
- Use images that you own or have permission to edit.
- Don’t use someone else’s image in a misleading or harmful way.
- Review the platform’s privacy and data-handling policies.
- Keep a backup of the original photograph.
- Check the terms of use before using edited images commercially.
- Disclose significant alterations when the context requires an authentic photograph.
ChatGPT users can review available privacy settings under Settings → Data Controls. On personal Free, Plus, and Pro workspaces, the Improve the model for everyone setting can be turned off. Workspace policies and other account settings may affect available controls.
Read the official OpenAI Data Controls guide for more information.
Frequently Asked Questions
1. How do I edit AI photos?
Upload your photograph to an AI editor such as ChatGPT or Canva. Describe the changes you want, review the generated result, and save the edited image.
2. Can I edit AI-generated images after creating them?
Yes. Many AI image-editing tools allow you to modify previously generated images. ChatGPT Images, for example, supports editing generated images and uploaded photographs.
3. How can I edit AI photos for free?
You can start with AI tools that offer free access or limited free features. Check the current usage limits and feature availability before starting your editing project.
4. Can I edit AI images without Photoshop?
Yes. Tools such as ChatGPT and Canva provide browser-based and mobile editing options for many common photo-editing tasks.
5. Can ChatGPT change the background of a photo?
Yes. Upload your photograph and describe the background you want. You can also select the background area when the image editor provides that option.
6. How do I fix distorted faces in AI-generated photos?
Use a detailed instruction asking the editor to correct facial distortions while preserving the original facial structure, identity, and natural skin texture. Always review the output carefully.
7. Can I edit AI photos on my smartphone?
Yes. ChatGPT and Canva offer mobile experiences for editing and improving images. The exact controls depend on the application and available features.
8. Which AI photo editor is best for beginners?
ChatGPT is useful for conversational editing, while Canva is helpful for combining photo editing with graphic design. Choose the tool that best matches your task.
9. Can AI remove unwanted objects from photographs?
Yes. AI editing features such as Canva Magic Eraser and Photoshop Generative Fill can remove selected objects and generate replacement content. Inspect the surrounding area after editing.
10. Do AI photo editors preserve original image quality?
Not necessarily. Generative editing can reconstruct details or modify parts of an original image. Keep a backup and inspect the exported image at its actual resolution.
Conclusion
Learning how to edit AI photos doesn’t require professional design experience. With the right tools and clear instructions, beginners can change backgrounds, remove unwanted objects, improve portraits, and create attractive images for blogs and social media.
ChatGPT is a convenient option for conversational image editing, Canva offers useful design and editing features, and Photoshop provides more detailed control for advanced projects.
The most important thing is to give precise instructions, preserve important original details, and inspect the final result before using it.
Start with a simple edit, experiment with different prompts, and gradually explore more advanced AI photo editing techniques.
For more inspiration, check out our AI Photo Editing Prompts Collection and discover new ways to improve your images.
READ MORE:
How Does Agentic AI Differ From Traditional Automation? 7 Key Differences